AOMEI Database Backupper provides two methods for users to add website source to the web.
Click Website Backup in the top console to get into Website Backup interface. You’ll see two big boxes below. Click the one in the left side. Click on Add Website Source in the lower left corner of the pop-up window. In the next pop-out window, select website and its type, edit the Name if necessary, and enter Host, Port, Username and Password in turn. For advanced users, you can click Advanced to configure more.

Click Sites Management in the top console and then Sources. Next, click Web Source option and then Add Website Source. You’ll get the exact pop-out window to add details for your website.

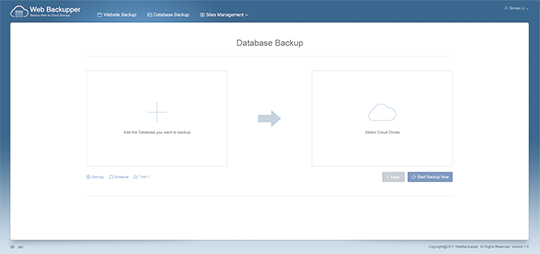
You can add database source to AOMEI Database Backupper in two methods as well.
Click Database Backup in the top console to get in Database Backup interface. Click the box in the left side. Click Add DB Source and you’ll get a small popping out window. Select a database, edit the Name, and enter Host address, input Username and Password in sequence.

Click Sites Management in the top console and then Sources. Next, click DB Source option and then Add DB Source. And then, input the specific information of your database.

Add cloud storages as the destination. Google Drive, OneDrive and Dropbox are available. You can add them in two methods as well.
Click the box in the right side in either Website Backup or Database Backup interface. Click Add Cloud Drive in the lower-left corner. In the pop-out window, select a cloud (Google Drive, OneDrive or Dropbox) and edit the Name if you want to. Click OK. You need to login the cloud drive in advance.

Click Sites Management in the top console and then Destination from the drop-down menu. Click Add Cloud Drive and then select a cloud from given options to save your website backup. Click Next. Click on Add Google Drive Account (or Add OneDrive Account or Add Dropbox Account) in the authorizing page to authorize. You need to login the cloud drive in advance.

Email notification is available in Settings. Tick the box Enable email notification, input your email address and click OK. All backup task information will send to your email automatically.

Click on Schedule and you’ll come into this window. By default, the backup task will run for once, and you can set the backup date and time for the task. With Daily mode, you can backup website or database up to three times a day. With Weekly mode, you can backup website or database at any time in any day(s) of a week. With Monthly mode, you can backup website or database at any time in any day(s) of a month.

Click Task 1 to edit the task name so that you can easily distinguish it from other tasks in a short time when you need it.

Click on Website Backup in the top toolbar and then click the area in the left side. In the next window, choose the site you want to backup and you can choose to back up the entire site or only specified directories of the site in the right pane. Click OK after your selecting. Then, click the pane in the right side to select the destination cloud and click OK. Finally, click Start Backup Now. You can click on Details after it starts to see detailed information of the backup.

Click on the Restore button. In the pop-up window, you can choose Restore files to original location or Restore files to a new location. With reliable restoration (delete original files when the restore process is complete), you can restore files without overwriting the original files if the restoring does not success.

You can add database source to eBackupAdd cloud storages as the destination. Google Drive, OneDrive and Dropbox are available. You can add them in two methods as well. per in two methods as well.
Sign up to have a try